


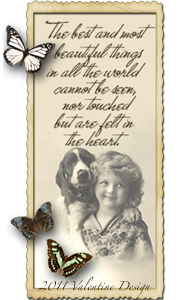


In the thick of winter I still dream of butterfly's . Here is a little card good for almost any occasion, Very simple and fast.


Or you could position the butterfly over the dyed piece, Note: curve the wings up slightly and only secure the center of the butterfly. There it is, My Final Card effort for this year!!
 Here are some sample cut outs that I was playing with before I decided to go white.
The cutout in the center is cut from actual photo paper. It is really beautiful and shiny too.


Start by selecting a premade card or making your own out of card stock Carefully position the die in the inside of your card where you want to cut it out
Stack it in the correct plates, then cut it out, set butterfly aside for now

Run the front cover through the cuttle bug or big shot with the embossing folder positioned where you like it

Cut a scrap of white card stock that is large enough to fit in your butterfly blank space. Using the dylusions ink, carefully take the top off. Start in the center of your paper and work outward toward each side equally. Use the length of the spray stick to lay the color on your paper. Keep the piece vertical so the drips will drip down. You can spritz it lightly with water to help move your inks. Dry with your heat gun . Iron it flat if it curls too much.


Position it in the blank space and glue it securely to the inside of the card front. It is very pretty like this and could be left as such if you like this look

Or you could position the butterfly over the dyed piece, Note: curve the wings up slightly and only secure the center of the butterfly. There it is, My Final Card effort for this year!!
See List of All supplies purchased at Scrapbookers Paradise

The cutout in the center is cut from actual photo paper. It is really beautiful and shiny too.

Slightly popped with white behind

Same as the white card work
"That's it, that is the best card effort I have for this year. Hats off to the real card makers.


1 comment:
YOU are a real card maker! This is absolutely stunning, Pam! The rainbow...wow. So cool.
BTW, blondes DO have more fun...I went back to brunette, since I'm too old for that much fun. lol!
Post a Comment