


Inspired by the upcoming season, I thought it was TREE TAG TIME

The first thing I did was pick a color pallet. I used pre-made tags to mount. But the rest is scraps and bits from the stash. And yes, that is a used, dry tea bag.
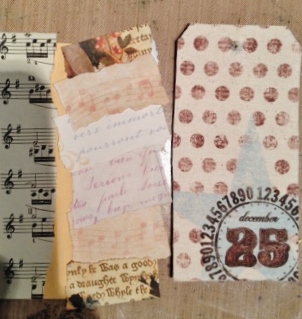
The above photo are the two starter tags. The one on the right is just covered with a piece of pre printed fabric. {Prima I think} The left is how I tore and stacked scraps along one side, then finished the exposed edge with a piece of vintage music sheeting.

I wanted to mute it a bit, so I first used a gesso white wash, then spritzed with a shimmer.

For the tree, I tore as above in layers. Then I glued just the edges together to form the base.

I folded a scrap piece of paper and free cut my basic tree outline.
Next I flipped over the base, and used my ink to outline the shape.

Next I fussy cut the edges and adhered to front of tag base.
Added the rub on words some ribbon,a rusted metal star and was done!


For the button tree, I tried to pick rows of similar size mother of pearl buttons from the stash jar. I set it up on the table first, then added the glue dots and centered them to the cloth card background. A few beads in between the buttons.
A silver top button, Dark mother of pearl for the stump, ribbons and done!
For this last one, I used scraps from both of the above projects. More stash ribbon and DONE!

How will you decorate your tree?

Thanks to pinners and pinterest


1 comment:
Oh those are CUTE! What a great idea to make little tags with trees on them... I must add that to my "wanna make" list!
big hugs!
Cheryl
Post a Comment