


I am sharing this with Scrapendipity Blog today. You should pop on over for some shopping on line or if you live in the Calgary area, you can shop in the
'Little Green Machine'

The first thing to do is assemble your supplies:
~Large cover for your working / spraying surface area
~Heavy water color or artist paper
~Dylusion spray in your color choice's I used 4 two yellows, a blue and a green
~Background mask template and texture template
~various stamps for your background
~a roll of inexpensive paper towel
~water spritz bottle
~Heat gun
~Black Gesso or ink for stamping
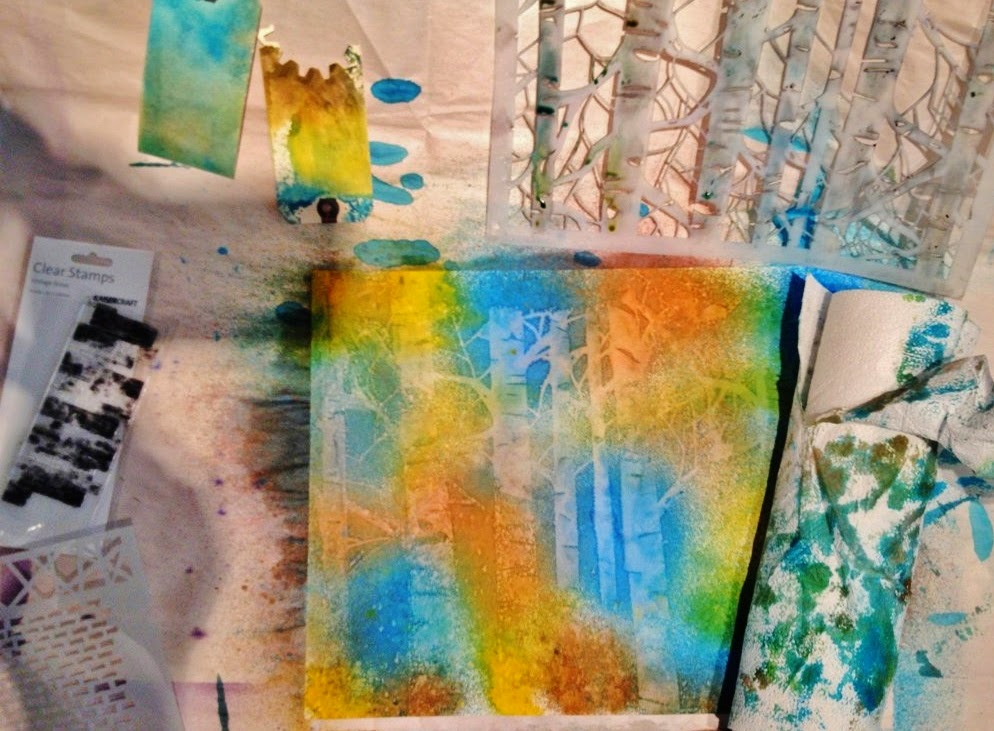
~Step one spray your background with alternating different layers of color
~Dry your piece, either with a heat gun or by rolling the paper towel across the surface.
~Now comes the fun part, take your background I used the 'aspens' template.
holding it away from your project give it a good all over spritz of water
~ Now lay it carefully, but firmly over your background.
~Take a minute....be patient, you can gently smooth it down so that the water
covered plastic makes contact with your background.
~Gently remove the template roll your paper towel over the surface and as it dry's you will see the template impression come to life
~As your paper towel saturates, just peel off the layers.
~Next I lay the texture template over random areas of background. Spritzed with water....waited a minute to start to ligten up, Rolled the paper towel over the entire wet area, removed it and dried it thoroughly

~Now for some stamping fun, I used a black Gesso with a sponge to spread it over the stamp. You have to work fairly quickly
~So,it is useful to preplan where you want your stamps to end up

~I cut a blank template the size of the photo I was using so I could position the cracked plaster stamp around the edges without getting paint on the photo
~NOTE: wash your stamps immediately so the gesso does not harden in them

I like to play with this type of 'art journal' background creating.
I really helps get my Mo-Jo going

Here is the finished piece


2 comments:
Wonderful tutorial. Love those stamps!!
Oh! This is just awesome, Pam! Gorgeous bright springy colours and what a fun technique :)
Post a Comment